
Technical Guides · 16 min read · Updated 2026-07-08
Concrete Surface Preparation for Coating: CSP Profile and Methods
Answer summary
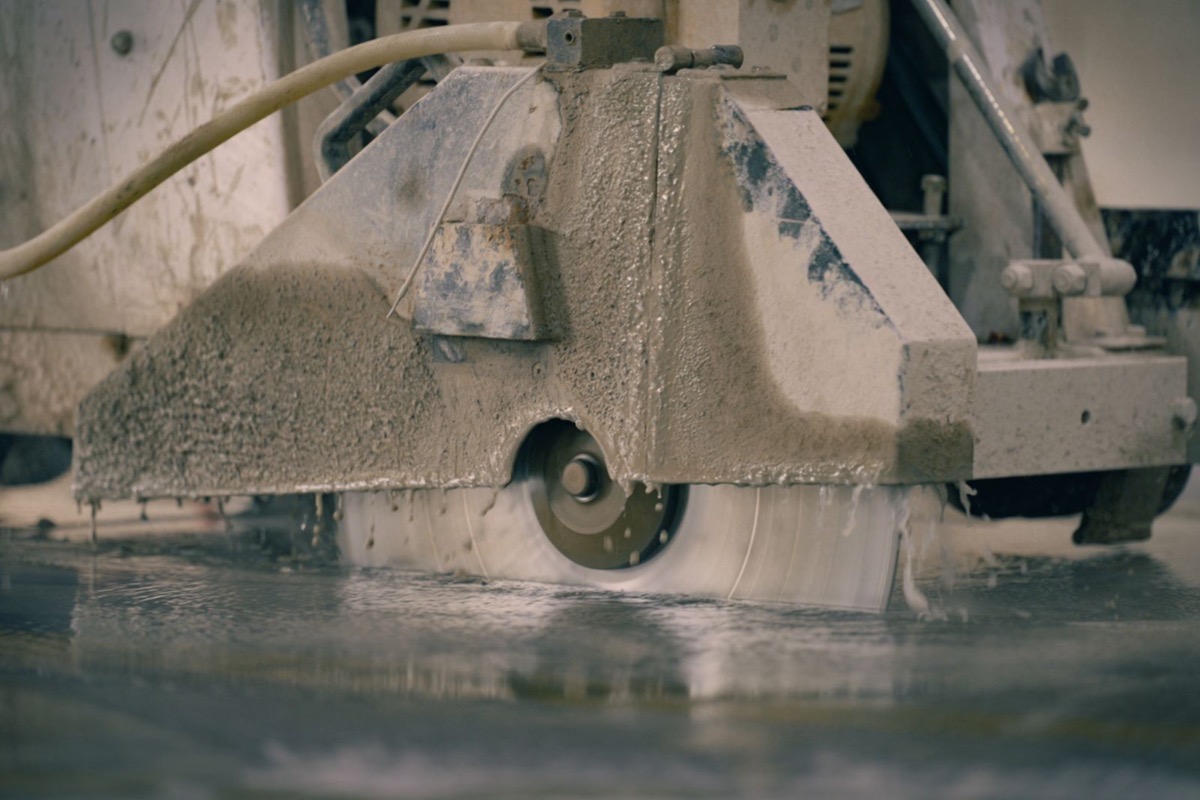
Concrete surface preparation for coating means mechanically removing laitance, weak concrete and contaminants, then opening the surface to a specified Concrete Surface Profile (CSP). ICRI Guideline No. 310.2R-2013 defines CSP 1 through CSP 10; high-build epoxy and urethane coatings are commonly specified at CSP 3–5. Profile and cleanliness are two separate acceptance criteria — a correctly profiled slab that is still dusty or oil-contaminated will fail, and no amount of profile compensates for contamination.
What surface preparation actually has to achieve
Resin coatings do not bond to concrete in the way most people picture. They bond to the outermost layer of sound cement paste and exposed aggregate, and they draw much of their strength from mechanical keying into an open, irregular surface. That means preparation has two independent jobs: it must take away everything that is not sound concrete, and it must leave behind a surface texture the coating can grip. Neither job substitutes for the other, and a slab can pass one while comprehensively failing the other.
The first thing that has to go is laitance. Laitance is the weak, fine layer of cement fines and water that rises to the surface as fresh concrete bleeds and is worked by the power float or trowel. It looks like concrete, it feels like concrete, and it is chemically the same material — but it is friable, porous and poorly bound to the slab beneath. A coating applied over laitance will bond faithfully to it, and then the laitance will detach from the concrete under load or under vapour pressure, taking the coating with it. The failure looks like a coating problem. It is a preparation problem.
The second category is contamination, and this is where profile alone cannot save a job. Oil and grease that have soaked into the pore structure, curing compounds sprayed on at construction, previous sealers, and above all silicone from adjacent works or old sealant joints are all bond-inhibiting. Opening a coarse profile through a contaminated slab simply gives you a coarse, contaminated slab with more surface area for the contaminant to sit on. Contamination has to be removed or degraded chemically and the residues taken away before mechanical profiling begins, and heavily oil-soaked concrete sometimes has to be cut out entirely. Sparco's TDS puts the requirement plainly: the substrate must be dry, sound, clean and free from oil, grease, loose material and other bond-inhibiting materials.
It is worth stating the consequence explicitly, because it is the single most misunderstood point in this whole subject. Profile and cleanliness are separate acceptance criteria. A slab that has been shot blasted to a textbook CSP 4 and then left overnight collecting dust, or one that was profiled straight through an old curing compound, has not been prepared. It has been roughened.
- Laitance — the weak surface layer of cement fines; must be removed mechanically, not sealed over
- Oil and grease — soaked into the pore structure; profile does not remove it, and heavily contaminated concrete may need cutting out
- Curing compounds and previous sealers — deliberately designed to reduce absorption, so they defeat primer penetration
- Silicone — from sealant joints or adjacent works; migrates, resists most cleaning, and causes localised craters and disbondment
- Dust from the prep itself — the last contaminant added, and the one most often left in place
Concrete Surface Profile: what CSP means and who defines it
Concrete Surface Profile, universally abbreviated to CSP, is the standardised way of describing how rough a prepared concrete surface is. It is defined in ICRI Guideline No. 310.2R-2013, Selecting and Specifying Concrete Surface Preparation for Sealers, Coatings, Polymer Overlays, and Concrete Repair, published by the International Concrete Repair Institute. The guideline establishes ten profiles, CSP 1 through CSP 10, running from the barely-textured surface left by light acid etching up to CSP 10, which corresponds to an amplitude greater than 6 mm. Older specifications occasionally cite a shorter range than the current ten profiles; where you encounter one, check it against the current guideline, which runs to CSP 10.
CSP is not measured with an instrument. It is assessed by comparison against a set of moulded rubber or plastic comparator chips, each replicating one profile, which the assessor holds against the prepared slab and matches by eye and by touch. This is a deliberately practical system, and it has the honest limitation that comes with any comparative method: it describes texture, not cleanliness, not strength, and not moisture. A comparator chip cannot tell you the slab is contaminated. Because assessment is comparative, it is worth having the specifier and the applicator agree the target profile on a sample area on site before the main works begin.
The mapping below is the profile-to-system pairing that is commonly specified across the industry, and it is a sound starting point for a specification. It is not, however, a requirement imposed by ICRI Guideline No. 310.2R-2013 — the guideline provides the CSP definitions and guidance on selecting preparation methods, while the profile a particular product actually needs is set by that product's manufacturer and by the project specification. Always read the technical data sheet. As a rule of thumb, the thicker the applied system, the coarser the profile it needs and the more profile it can tolerate without telegraphing texture through to the finished surface.
- CSP 1 through CSP 10 — ten profiles, defined by ICRI Guideline No. 310.2R-2013
- CSP 10 corresponds to an amplitude greater than 6 mm
- Assessed by matching against moulded comparator chips, not by instrument
- The mapping above is commonly specified, not an ICRI requirement — the product TDS governs
- Agree the target profile on a site sample area before the main works begin
| Coating type / thickness | Commonly specified CSP | Why |
|---|---|---|
| Thin penetrating sealers and thin-film sealers | CSP 1–2 | Low film build cannot bridge a coarse profile; texture would telegraph through |
| High-build epoxy and urethane coatings | CSP 3–5 | Enough mechanical key for a substantial film without exposing profile at the surface |
| Polymer overlays, self-smoothing screeds and cementitious toppings | CSP 6 and above | Thick, heavily loaded systems need deep mechanical keying to resist shear and impact |
Preparation methods compared, and where acid etching stands
Sparco's TDS is specific about the family of methods that is acceptable: concrete must be prepared mechanically, by ball blasting, milling or diamond grinding. That clause is doing more work than it first appears. It is not simply listing three machines — it is excluding chemical preparation from the accepted route, and it is placing the burden on a mechanical process that physically removes material rather than one that dissolves and redeposits it.
Method selection is driven by the profile you need, the amount of material you have to take off, the condition of the existing surface, and the practical constraints of the site — noise, dust, water, headroom, and how quickly the area has to be handed back. In a live Singapore facility working a short shutdown window, the dust containment and the reinstatement time often matter as much as the profile itself. Most real projects use two or three methods together: a primary method across the open field, a secondary method to correct it, and hand tools at the edges.
Acid etching deserves to be addressed directly rather than left as a footnote, because it still appears in specifications and still gets used. The prevailing professional view is that acid etching is inadequate as preparation for resin flooring, and the reasoning is consistent across the industry: it does not remove laitance reliably, because the acid attacks the cement paste indiscriminately rather than selectively lifting the weak layer; it leaves behind salts and reaction products that must be rinsed out completely and rarely are; the rinsing introduces water into the slab immediately before a coating is applied; it does nothing whatsoever to oil, grease, curing compounds or silicone; and it cannot produce a consistent, specifiable profile across a slab of varying density and finish. This is a professional consensus rather than a ruling handed down by a test standard, and it should be understood as such — but it is a consensus, and it aligns with Sparco's own TDS requirement for mechanical preparation.
| Method | What it does | Typical CSP achieved | Suitable for | Notes |
|---|---|---|---|---|
| Diamond grinding | Abrades the surface with rotating diamond segments; removes thin laitance and levels high spots | CSP 1–3 | Thin coatings and sealers; smoothing after a coarser method; removing existing thin films | Low profile. Can polish and close the surface if run too fine — check absorption before priming |
| Shot blasting (ball blasting) | Fires steel shot at the slab under a vacuum shroud, fracturing away laitance and weak paste | Typically CSP 2–7 depending on shot size, speed and number of passes | The default primary method for large open floor areas; high-build epoxy and urethane | Near-dust-free and no water. Leaves a linear striping pattern that must be blended; struggles on soft or oil-soaked concrete |
| Scarifying / milling | Rotating drum of hardened cutters flails the surface, removing material aggressively | Typically CSP 4–7; heavier machines take it higher | Removing thick coatings, heavy build-up, or significant depth of unsound concrete | Fast and deep. Leaves pronounced grooves and can bruise the concrete beneath — usually needs a secondary grind |
| Scabbling | Pneumatic piston heads hammer the surface, breaking out material by impact | Typically CSP 7–9 | Deep removal of badly degraded or heavily contaminated concrete before reinstatement | Very aggressive, very noisy. Microcracks the substrate; the bruised layer must then be removed |
| High-pressure water jetting | High-pressure water removes weak material without mechanical impact on sound concrete | Typically CSP 5–9 depending on pressure | Contaminated slabs, congested areas, and where vibration or dust cannot be tolerated | Selectively removes weak material. Saturates the slab — the drying time before coating can be substantial and must be planned |
| Acid etching | Chemically attacks cement paste at the surface | Nominally CSP 1–3, but inconsistent and unreliable in practice | Widely regarded as unsuitable for resin flooring; not accepted by Sparco's TDS, which requires mechanical preparation | Does not reliably remove laitance; leaves salts and residues; introduces water; ineffective against oil, grease, curing compounds and silicone |
The preparation sequence, and verifying it before primer goes down
Preparation is a sequence, and the order matters. Contamination is removed before profiling, because profiling through contamination drives it deeper. Profiling happens before defect repair, because you cannot see the full extent of a blowhole or a delamination until the surface is opened — Sparco's TDS requires that weak concrete be removed and that blowholes and voids be fully exposed, which is only possible after the profile is open. Repairs then cure. Verification comes last, immediately before priming, because a slab verified on Friday and primed on Monday has been re-contaminated by three days of site dust.
Dust removal is the step most often done badly. After shot blasting or grinding, the slab carries a layer of fine dust that is, functionally, fresh laitance. It must be vacuumed with industrial equipment, not swept — sweeping redistributes fine dust into the open profile you just spent a day creating and drives it into the pores, where a brush cannot reach it. Vacuum, then check by drawing a clean dark cloth or a gloved hand across the surface. Edges, upstands, coving, and the areas around drains, plinths and column bases cannot be reached by the ride-on machinery and get done with hand grinders and needle guns. These areas are where coatings most commonly lift first, and they are exactly the areas where the temptation to prepare to a lower standard than the main field is strongest.
Verification means checking four things, not one. Profile, against the comparator chips and the specified CSP. Cleanliness, by visual inspection and wipe test — remembering that this is a separate criterion from profile. Moisture, which the coating manufacturer's limit governs (Sparco's TDS caps maximum permissible concrete substrate moisture content at 5%, and the methods for testing it are covered in our article on concrete moisture testing before coating, which is where that subject properly belongs). And the mechanical soundness of the prepared surface, by pull-off testing.
For pull-off adhesion on concrete, the applicable method is ASTM D7234, Standard Test Method for Pull-Off Adhesion Strength of Coatings on Concrete Using Portable Pull-Off Adhesion Testers. One practical detail is routinely missed: where an existing coating is thicker than roughly 20 mils (about 0.5 mm), the coating must be scored through, down to the concrete, around the perimeter of the dolly before the dolly is bonded. Without scoring, the surrounding film shares the load and the test reports a strength the bond does not have. Sparco's TDS sets a minimum pull-off strength of the prepared substrate of 1.5 N/mm² and, for Sparcofloor WBE 400, a minimum concrete compressive strength of 25.0 N/mm². Note that these are the manufacturer's substrate requirements — acceptance criteria for a coated system are set by the project specification, not by the test standard.
Once the slab passes, prime it. Sparco Epoxy Bonding Primer #100 is applied at a coverage of 6–8 m²/kg per coat, with a minimum substrate temperature of 5 °C and curing between +10 °C and +35 °C; Sparco SB Prime 107 is a low-viscosity two-part solvent-based epoxy primer for the same role. Defects, blowholes and voids exposed during preparation are reinstated with Sparco Epoxy Mortar, a non-shrink three-pack steel-trowel-applied repair material, before the primer goes down. Product selection depends on substrate, absorption and exposure and should be confirmed through technical review.
-
Assess and test the slab
Strength, soundness, contamination, moisture, existing coatings
-
Remove weak concrete, laitance and contaminants
Nothing bonds through laitance, oil or curing compound
-
Open the profile mechanically to the specified CSP
Ball blasting, milling or diamond grinding
-
Repair defects, blowholes and cracks
Expose voids fully, then reinstate with epoxy mortar
-
Verify before priming
Profile, cleanliness, moisture and pull-off — all four
Verification is a gate, not a formality — profile, cleanliness, moisture and pull-off are all checked before any primer is applied.
Common mistakes in concrete surface preparation
The failures below are not exotic. They are the ordinary ways that competent people, under time pressure, produce a slab that looks prepared and is not. Coating failures are generally traced back to two dominant mechanisms — inadequate surface preparation and substrate moisture — and sources differ on which of the two leads. What is not in dispute is that both are decided before the first coat is applied, and both are cheap to get right and expensive to correct.
Every item here has the same underlying shape: a step was substituted with something faster that superficially resembles it. Acid instead of a machine. A broom instead of a vacuum. A visual glance instead of a moisture test. Each substitution produces a slab that passes the eye and fails the bond.
- Acid etching instead of mechanical preparation — leaves laitance, salts and moisture behind and cannot produce a consistent profile; Sparco's TDS requires ball blasting, milling or diamond grinding
- Sweeping instead of vacuuming — drives fine dust into the open profile rather than removing it, creating a fresh weak layer at the bond line
- Profiling but not decontaminating — opening a coarse CSP straight through oil, grease, curing compound or silicone; the contaminant is still there, now with more surface area
- Priming a slab that has not been moisture-tested — a slab can be dry at the surface and far above the limit inside; Sparco's TDS caps substrate moisture content at 5%
- Hand-preparing edges, upstands, drains and plinths to a lower standard than the main field — these are precisely the locations where coatings lift first
- Verifying days before priming, then priming over accumulated site dust — verification is only valid immediately before the coat it authorises
- Treating CSP as the whole acceptance test — profile and cleanliness are separate criteria, and a profiled but dusty slab still fails
Checklist: signing off preparation before primer
Use this immediately before the primer is opened, not the day before. Every item is a hold point, and any single failure stops the primer. The value of a written sign-off is that it forces the four acceptance criteria — profile, cleanliness, moisture and soundness — to be recorded separately, so that nobody can pass the slab on the strength of the one that happens to be easiest to see.
Photograph and record the results with the date, time, location and ambient conditions. On a warranty claim or a dispute, the preparation record is generally the first document that gets asked for and the one least often produced.
- Specified CSP confirmed against ICRI comparator chips, checked at multiple locations across the field, not just one
- Sample area agreed with the specifier and applicator before the main works, and the finished field matches it
- All weak and unsound concrete removed; blowholes, voids and delaminations fully exposed
- Contamination removed — no oil, grease, curing compound, previous sealer, silicone or other bond-inhibiting material remaining
- Defects reinstated with a non-shrink repair material such as Sparco Epoxy Mortar, and repairs fully cured
- Slab vacuumed with industrial equipment, not swept; wipe test on a clean cloth comes back clean
- Edges, upstands, coving, drains, plinths and column bases prepared to the same standard as the main field
- Substrate moisture content measured and within the coating manufacturer's limit (Sparco's TDS: maximum 5%)
- Pull-off strength of the prepared substrate verified per ASTM D7234; Sparco's TDS requires a minimum of 1.5 N/mm²
- Where specified, concrete compressive strength confirmed (Sparcofloor WBE 400 TDS: minimum 25.0 N/mm²)
- Substrate and ambient temperatures within the primer's stated range before application begins
- Results photographed and recorded with date, time, location and ambient conditions
When to use this system
- Before any resin coating, screed or overlay is applied to concrete
- When writing or reviewing a flooring specification
- When investigating a coating that has delaminated from the slab
- When tendering, to compare what each contractor has actually priced for prep
Where it is commonly used
- Warehouse and logistics slabs before high-build epoxy
- Food and beverage floors before PU screed or polymer overlay
- Car park decks and loading bays before waterproofing systems
- Refurbishment works where an existing coating is being removed
Related Sparco products
Recommended TDS downloads
Browse the TDS Download Centre →Related market segments
Manufacturing & Warehousing
Production floors and warehouses take forklift traffic, impact, spills and around-the-clock operations. Sparco's full flooring range — from bonding primers and repair mortars to self-smoothing epoxies and polyurethane topcoats — keeps industrial floors serviceable with minimal downtime.
Chemical Processing
Process areas, bund walls and storage zones demand floors that stand up to spills, cleaning regimes and mechanical wear. Sparco's solvent-free epoxy systems and polyurethane screeds provide medium-to-heavy chemical resistance with seamless, easy-to-clean finishes.
Related solutions & guides
Frequently asked questions
What CSP do I need for an epoxy coating?
High-build epoxy and urethane coatings are commonly specified at CSP 3–5, while thin sealers are commonly specified at CSP 1–2 and polymer overlays or cementitious toppings at CSP 6 and above. These are conventional pairings rather than a requirement imposed by ICRI Guideline No. 310.2R-2013, which defines the CSP 1 to CSP 10 profiles themselves. The profile a specific product needs is set by its technical data sheet and by the project specification, so read the TDS before fixing the profile in a spec.
Is shot blasting better than diamond grinding?
They do different jobs rather than one being better. Shot blasting is the usual primary method for large open floor areas because it fractures away laitance and weak paste quickly, is essentially dust-free under its vacuum shroud, and can reach a range of roughly CSP 2–7 depending on shot size and pass rate; diamond grinding produces a much lower profile of around CSP 1–3 and is better for thin coatings, for levelling high spots, and for blending the striping that shot blasting leaves behind. Most projects use both — shot blasting across the field, grinding to correct it.
Can I acid etch concrete instead of grinding it?
Acid etching is widely regarded across the industry as inadequate preparation for resin flooring, and Sparco's TDS does not accept it — the TDS requires that concrete be prepared mechanically by ball blasting, milling or diamond grinding. The objections are that etching does not remove laitance reliably, leaves salts and reaction residues behind, introduces water into the slab immediately before coating, does nothing at all to oil, grease, curing compounds or silicone, and cannot produce a consistent profile. This is a professional consensus rather than a ruling from a test standard, but it is a settled one.
How do I know the slab is clean enough to coat?
Cleanliness is a separate acceptance criterion from profile, and it has to be checked separately. After profiling, vacuum the slab with industrial equipment rather than sweeping it — sweeping drives fine dust into the open profile — then draw a clean dark cloth or a gloved hand across the surface and confirm it comes back clean. Visual inspection should also confirm no oil staining, curing compound sheen, previous sealer or silicone residue remains, because a correctly profiled slab that is still contaminated will fail.
What is laitance and why does it have to be removed?
Laitance is the weak, friable layer of fine cement particles and water that rises to the surface as fresh concrete bleeds and is then worked by the power float or trowel. It is chemically the same material as the concrete beneath but is porous and poorly bound to it, so a coating applied over laitance bonds to the laitance and then the laitance detaches from the slab. It must be removed mechanically — Sparco's TDS requires that weak concrete be removed and that blowholes and voids be fully exposed.
How is pull-off adhesion tested on a concrete floor?
The applicable method is ASTM D7234, Standard Test Method for Pull-Off Adhesion Strength of Coatings on Concrete Using Portable Pull-Off Adhesion Testers, in which a dolly is bonded to the surface and pulled off with a portable tester. Where an existing coating is thicker than roughly 20 mils (about 0.5 mm), it must be scored through to the concrete around the dolly before bonding, or the surrounding film shares the load and the result overstates the true bond. Sparco's TDS calls for a minimum pull-off strength of the prepared substrate of 1.5 N/mm²; acceptance criteria for a completed coating system are set by the project specification.
Related guides
15 min read
Concrete Moisture Testing Before Coating: ASTM F2170 and F1869
Read guide →
12 min read
Why Industrial Floor Coatings Fail: A Diagnostic Guide
Read guide →
11 min read
Why Is My Epoxy Floor Peeling? Adhesive vs Cohesive Failure
Read guide →
9 min read
Warehouse floor flatness: what FM2, FF and FL actually mean
Read guide →
8 min read
What is an anti-carbonation coating, and when does concrete need one?
Read guide →
Related project references
Anonymised references from real Sparco projects show how these systems are applied on comparable sites.
Browse project references →Values referenced in this guide come from the products' Technical Data Sheets. Final specification depends on substrate, traffic, chemical exposure and shutdown window — confirm the complete build-up with our technical team.